
Getting Started
Amorphic Analytics Studio provides AI-driven business intelligence features integrated within Amorphic. Leveraging AWS QuickSight, it allows you to convert disorganized data into accountable insights, facilitating quicker decision-making and enhancing overall business performance.
Get Access to Analytics Studio
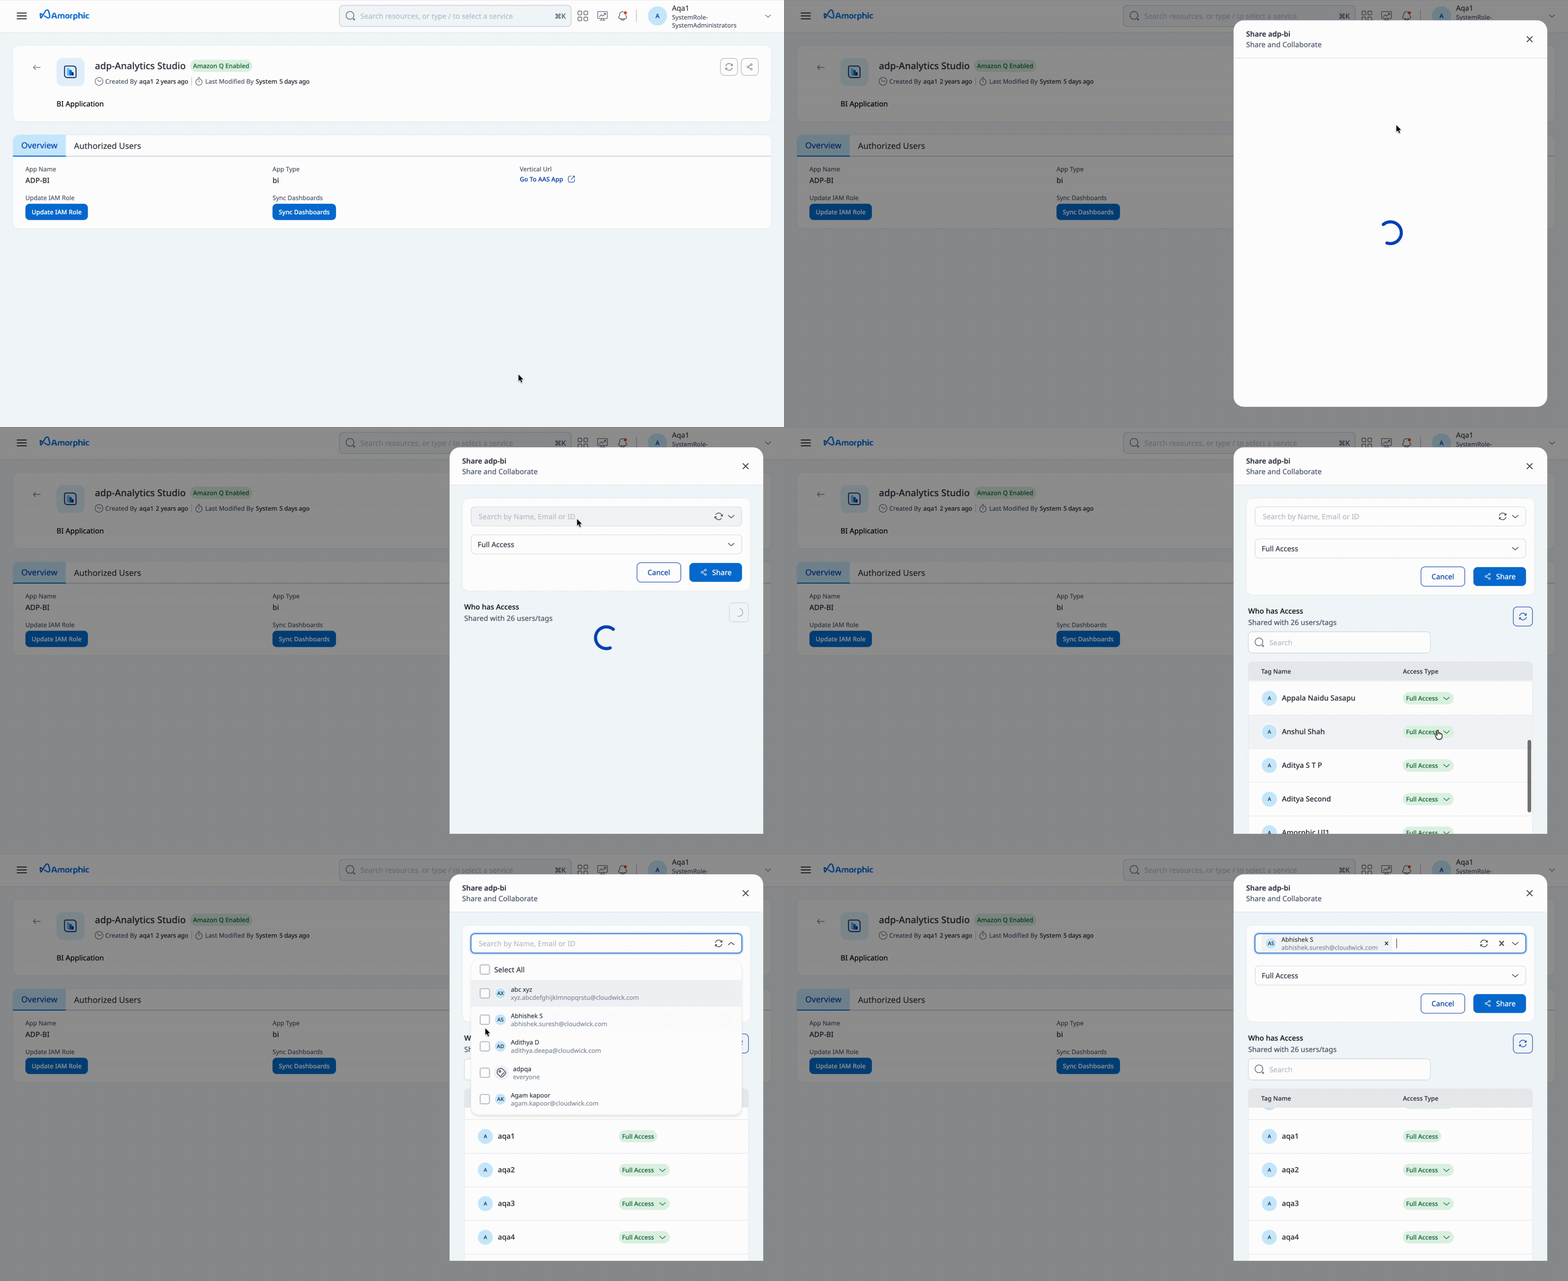
Users with 'Owner' access to the Analytics Studio in Amorphic have the ability to grant access to other users. The sole prerequisite is that these users must already be registered in Amorphic.
Granting a user access to the Studio allows them to view the application in the App Center. However, this action does NOT register the user for Studio access. For registering a user, see Add New Users.
Add New Users
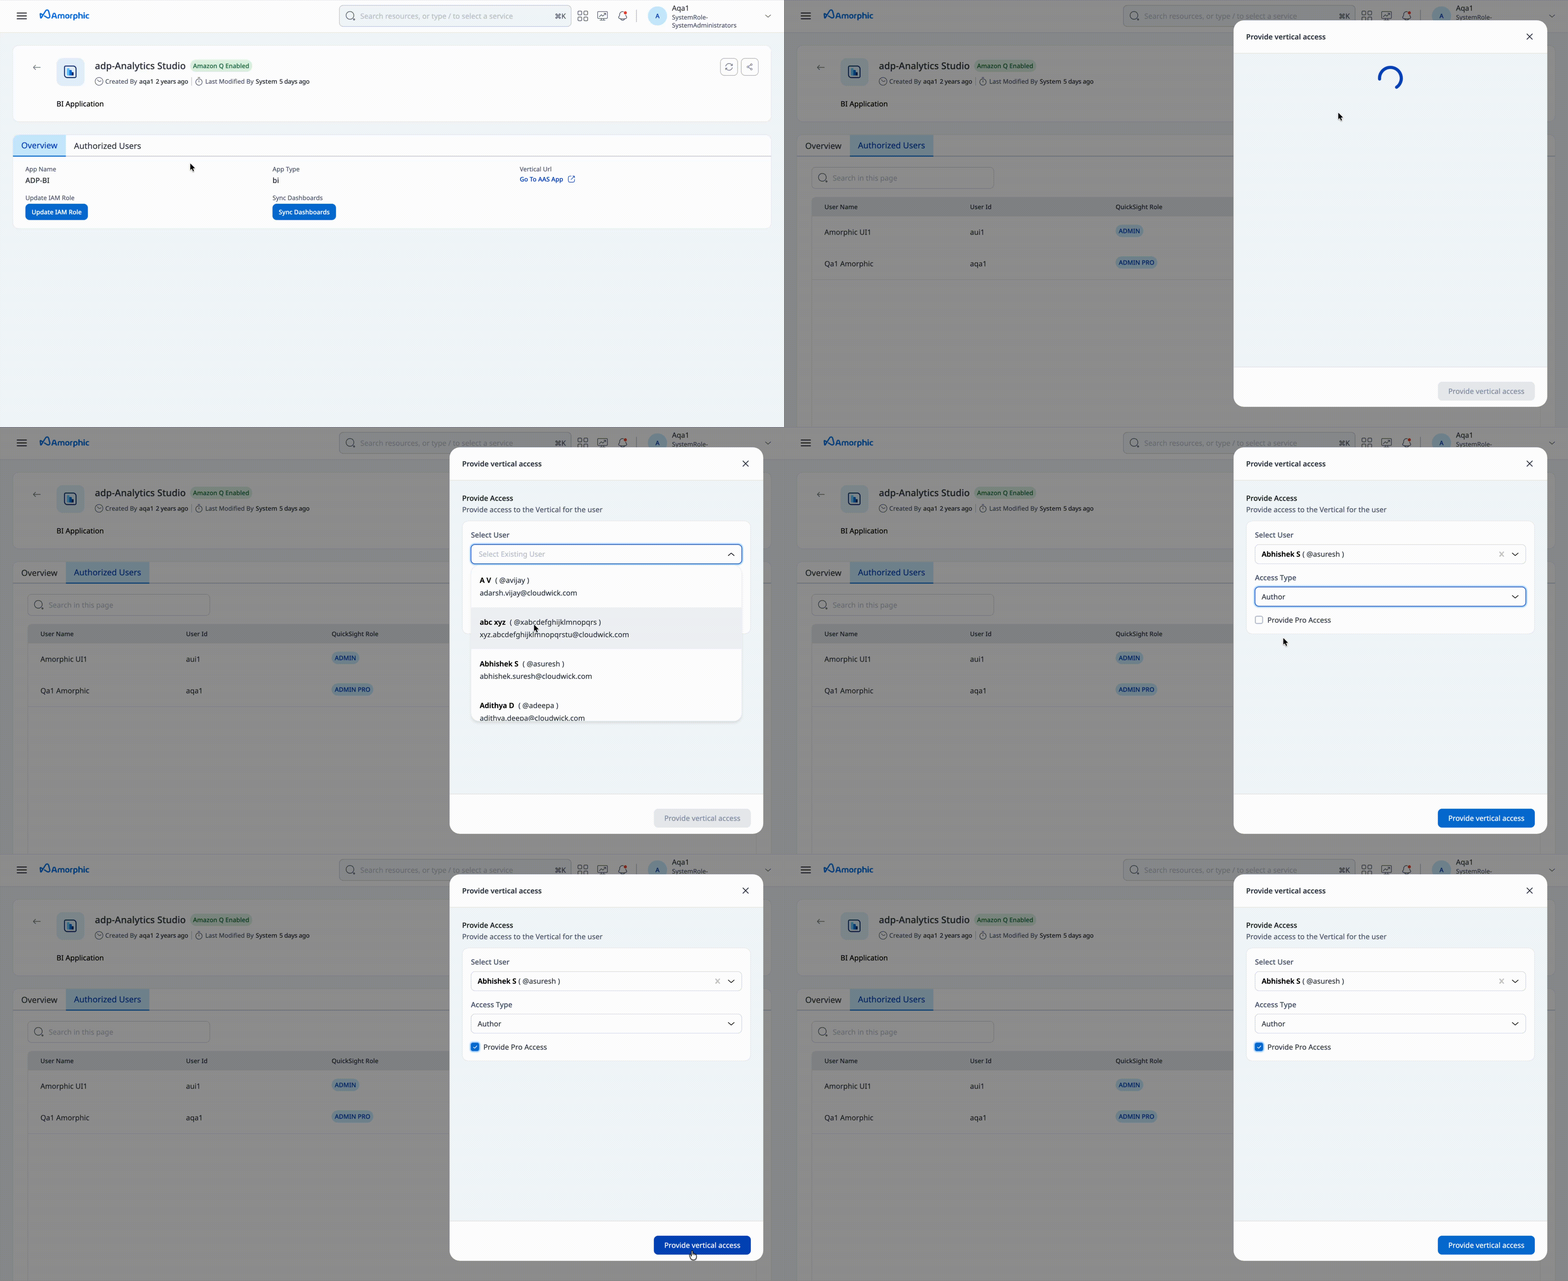
To add users to the Analytics Studio, follow these simple steps:
- On Amorphic, navigate to the App Center and select Analytics Studio.
- Click on the
Authorized Userstab on the application page. - Click on
Provide vertical accessbutton and select a user from the list of existing Amorphic users. - Choose an access type for the user: Admin, Author, or Reader. Check the
Provide Pro Accessbox to upgrade to a pro role. - Click on the
Provide vertical accessbutton on the bottom right of the pane to add the selected user.
- The registration process is asynchronous. Users will be notified via email and push notifications upon successful registration.
Proroles are a premium feature and are exclusively available to users in Amazon Q-enabled environments.- Following the Studio upgrade to v2.0 (introduced with Amorphic v3.3), users may need to refresh their IAM roles to access the latest features. To refresh an IAM role, refer to Update IAM Role.
Change User Role
The Analytics Studio supports three role types: Admin, Author, and Reader, similar to AWS QuickSight. To change a user's role, follow these steps:
- Navigate to the user list under the
Authorized Userstab. - Click on the 'Edit' () icon next to the user whose role you wish to change.
- Select the new role from the available options.
- Click on the
Updatebutton on the bottom right corner to save the changes.
- Users with the Reader role do not have access to a data source. When upgraded to Admin or Author, a data source will be created for them. To know more about data sources, see Datasources.
- Once upgraded, non-reader roles cannot be converted to a reader role.
Log Into Analytics Studio
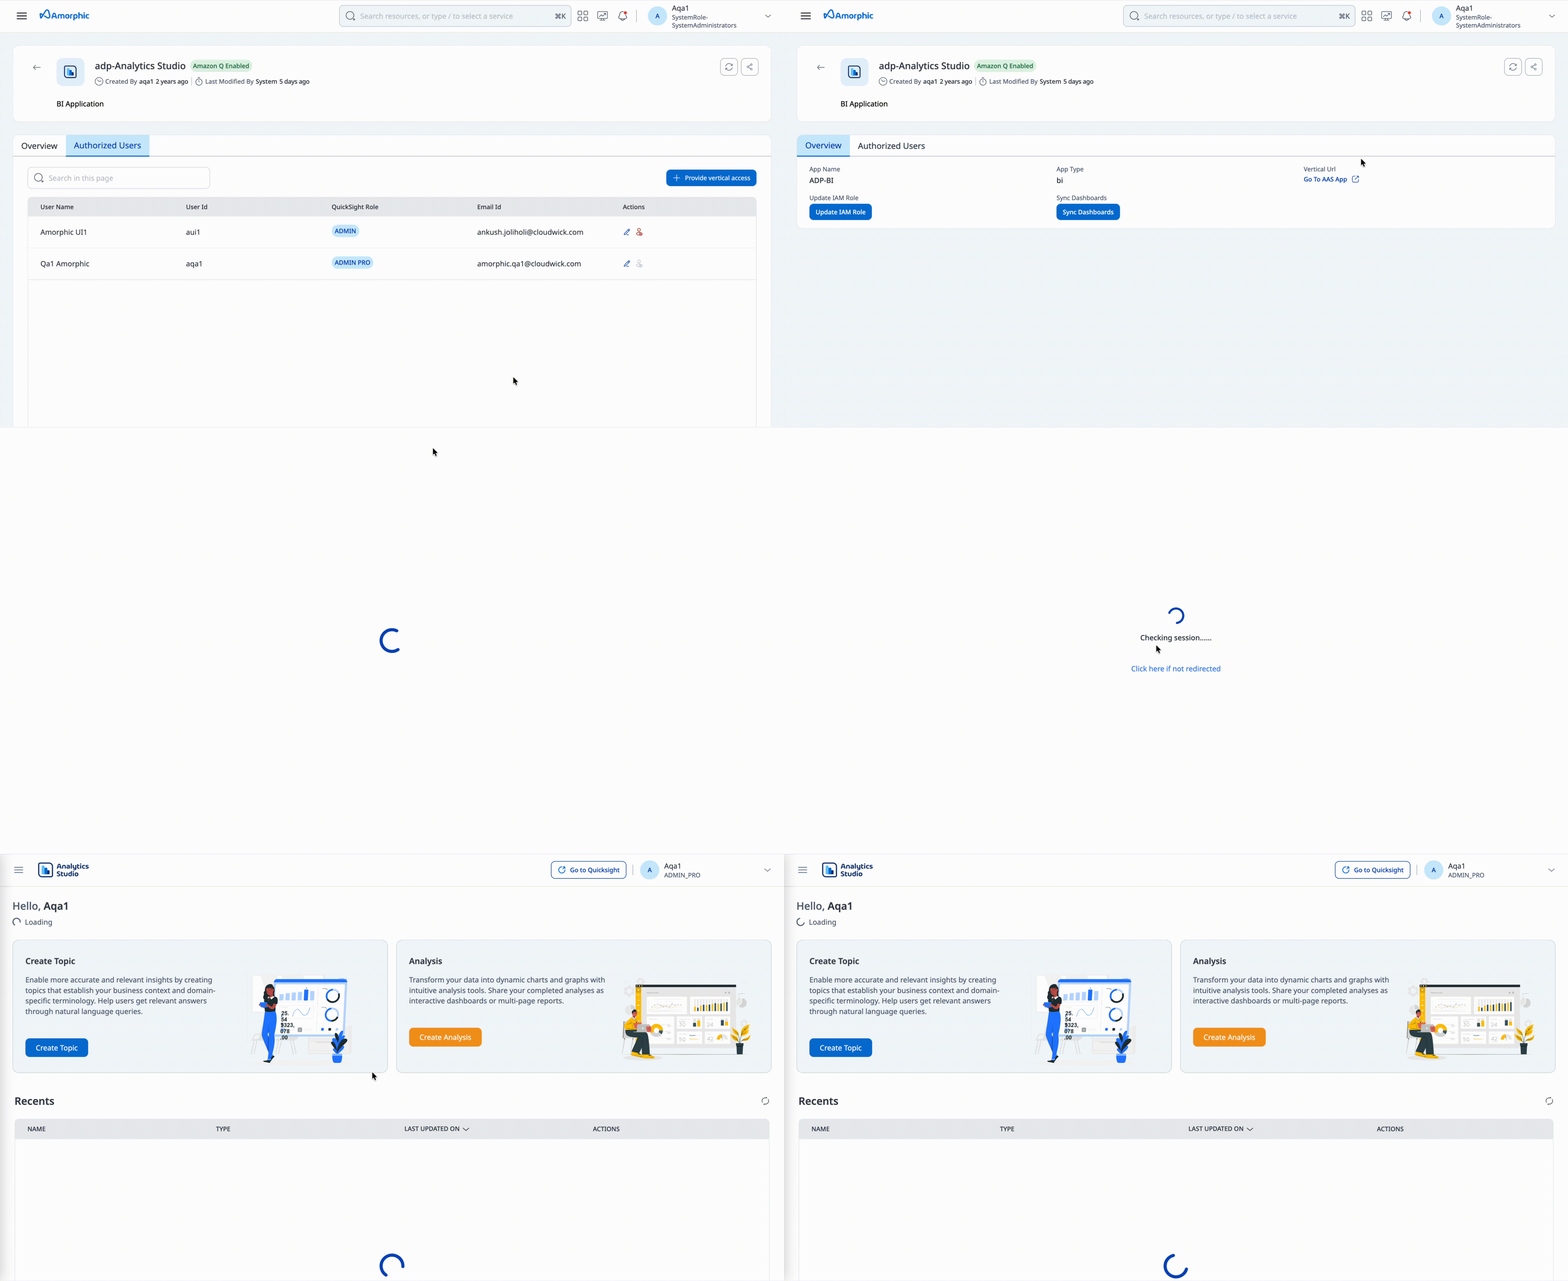
The Analytics Studio operates as a specialized vertical within the Amorphic ecosystem. Users can access the platform using one of the two methods outlined below:
- Direct Navigation: Click the 'Go To AAS App ' link within the main interface. This action will automatically redirect you and authenticate your session using your current session's credentials.
- Manual URL Entry: Navigate directly to the Studio by entering its URL in your browser. From there, select your preferred authentication provider and enter your credentials to log in.
Upon the initial login, a dedicated Studio user profile is automatically created for the account.
- In case you forget your password, select the 'Forgot Password?' link on the app login page and follow the automated recovery instructions.
- For users not utilizing Single Sign-On (SSO), updating your password here will also synchronize and update your primary Amorphic credentials.
Revoke Access from Analytics Studio
When a user no longer requires access to the Analytics Studio application, the owner must choose between permanently deleting their profile or transferring their existing assets to another user before removal.
Delete a User
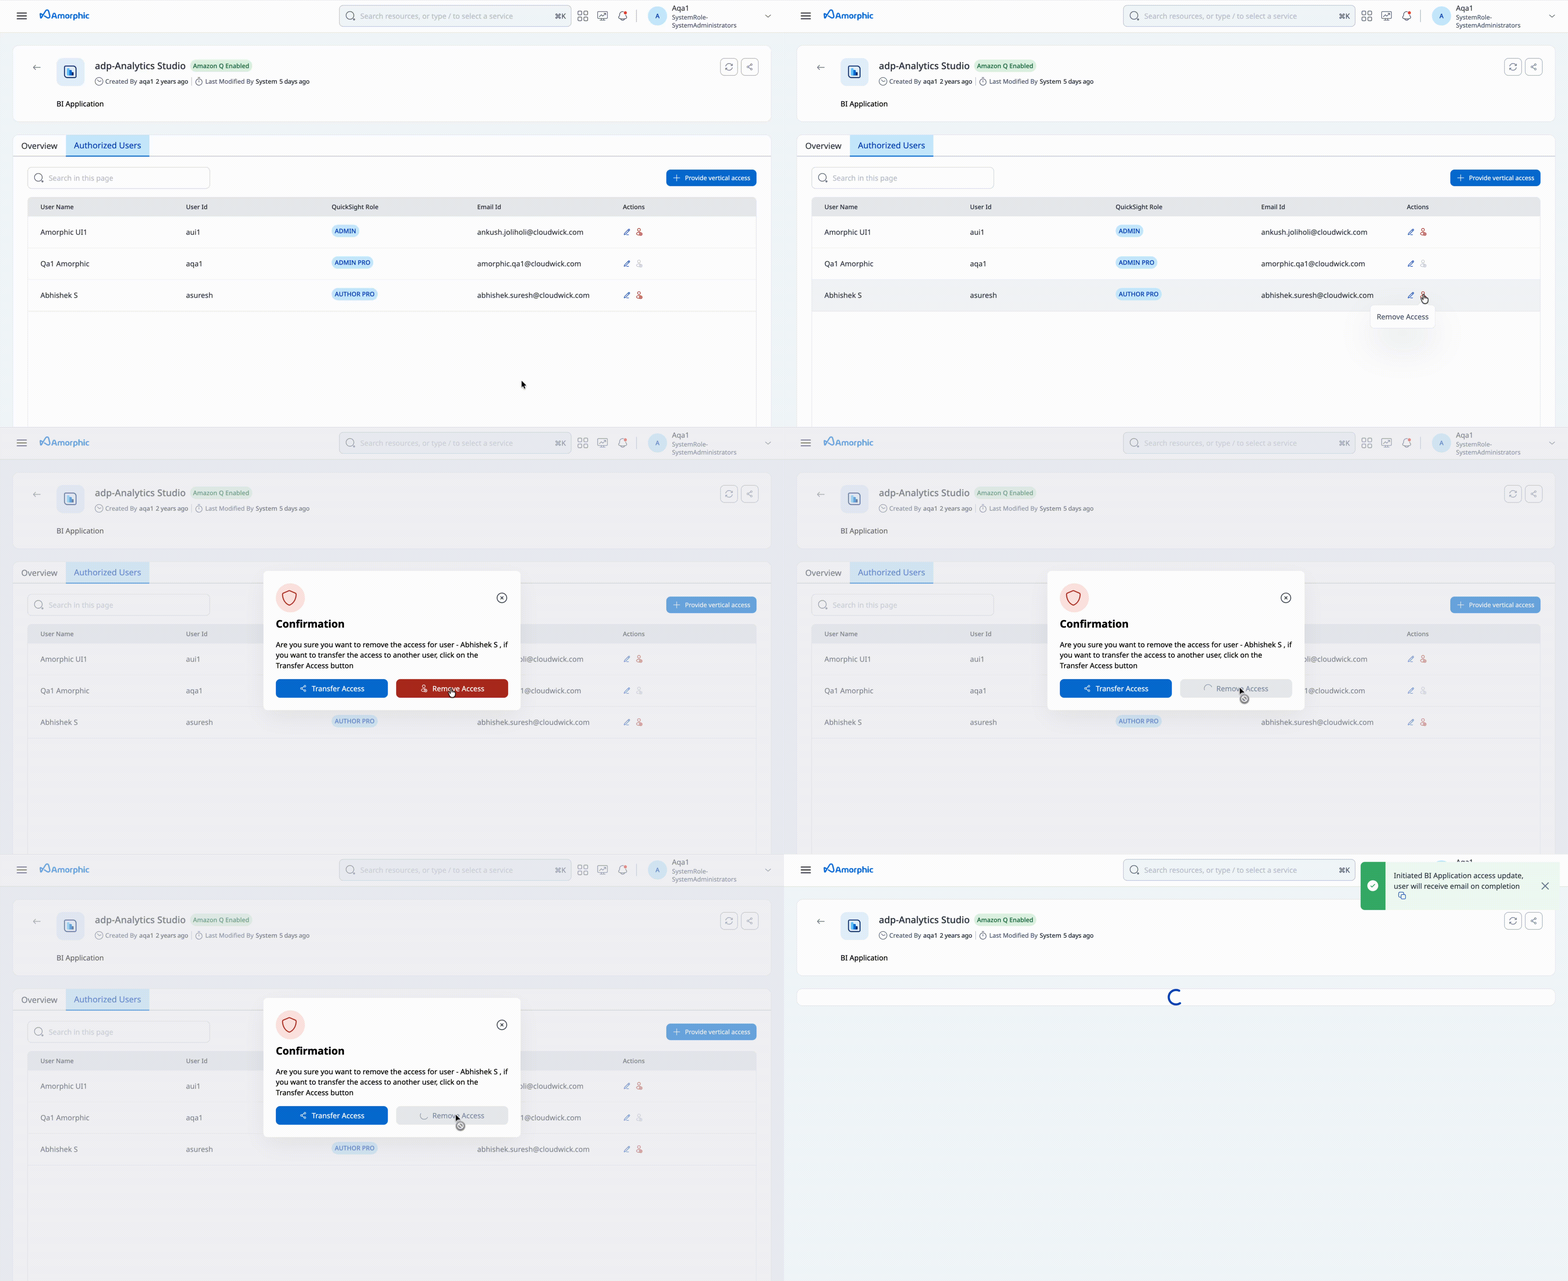
This action permanently removes the user from the Analytics Studio. Please note that deleting a user does not automatically delete all associated assets owned by that individual. A user can be deleted by following the steps below:
- Navigate to the user list under the
Authorized Userstab. - Click on the 'Remove Access' () icon next to the user who you want to remove.
- Click on
Remove Accessto revoke the user's permissions and delete their profile.
Transfer Access and Delete
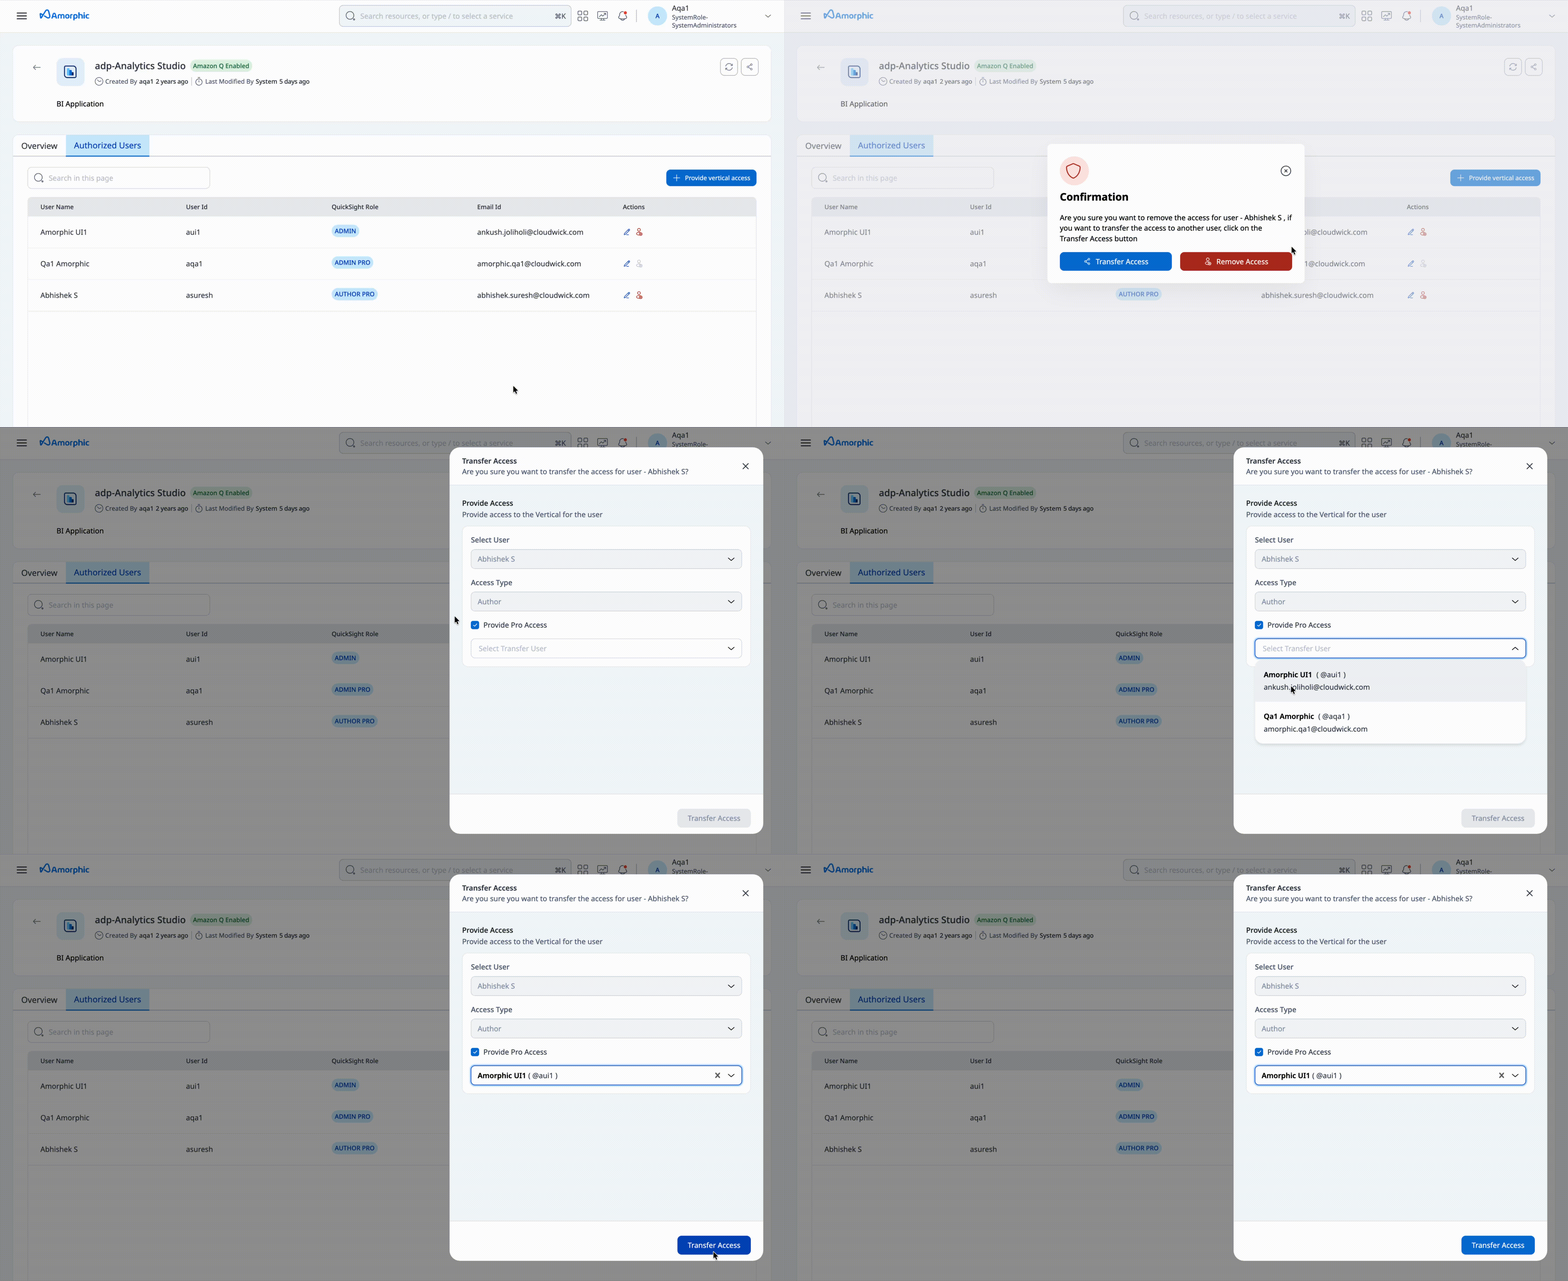
This method allows a user's removal while preserving their work. All assets owned by the departing user will be reassigned to a designated recipient before the original account is deleted. To transfer access, follow the steps below:
- Navigate to the user list under the
Authorized Userstab. - Click the 'Remove Access' () icon next to the user who you want to remove.
- Click on
Transfer Access, and select a target user from the dropdown menu who will become the new owner of the assets. - Click the
Transfer Accessbutton on the bottom right to confirm the transfer and delete their profile.
- The deletion process is asynchronous. The user will be notified via email and push notification upon successful deletion, at which point they will be removed from the Authorized Users section.
- The Athena data source created during the user registration process will also be deleted.
Next Steps
- Find out more about Analytics Studio components - See Assets.
- Learn how to manage your assets - See Asset Management.
- Learn how to manage your data entities - See Data Management.
- Access advanced administrative features - See Amazon Quick.